Purchase Orders
Create and track Purchase Orders
Introduction:
The purchase order feature enables users to
- Create pre-set of terms and special contract conditions that can be added to the PO with one click
- Set the approval route with a workflow that creates a pre-defined approval process
- Set the threshold limit of the amount and maximum number of days for approval by each person
- Create PO, print with Tax rates and discounts for each item or on the subtotal
- Summary list of the PO's created, Total amount, Tax amount, Status, Search by name of the project.
________________________________________
Steps for creating a purchase order
Realtraker offers advanced features to process the purchase orders by routing through different users to approve the PO.

Step 1: Terms
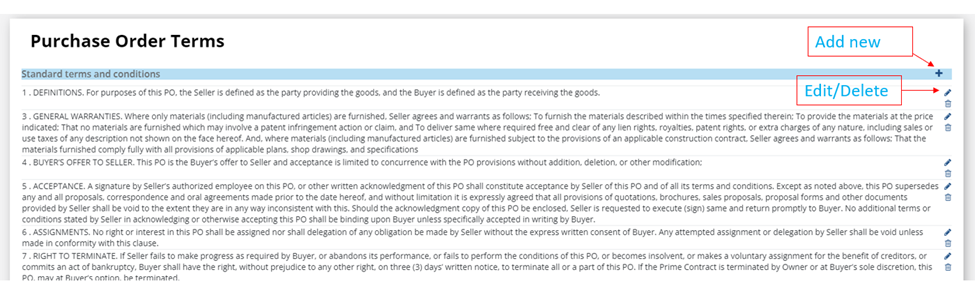
Set up the terms of the purchase order one time, which can be added with one click each time.
Click 'Terms'
Customize the existing list of terms to suit your company. You can edit. delete, add a new item with one click.
These pre-set terms will appear in the Purchase Order form to add with one click. If you do not need any additional terms in the purchase order, you can ignore the preset terms and proceed with the Purchase order.
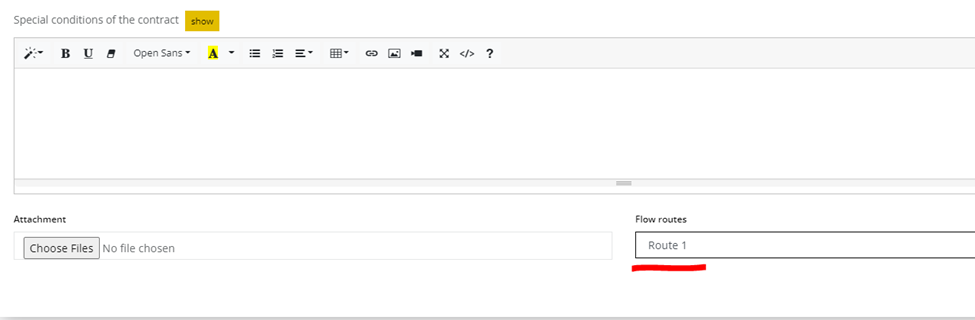
Special conditions can be added similar to the Terms
Step 2: Settings
Realtraker enables users to create a Purchase order flow for the approval process. In big sized company, each project may have a different team with a predetermined sequence to approve the Purchase Order.
If Purchase Order is to be created and approved by admin or the same person
Select 'No Route' in the dropdown list
________________________________________
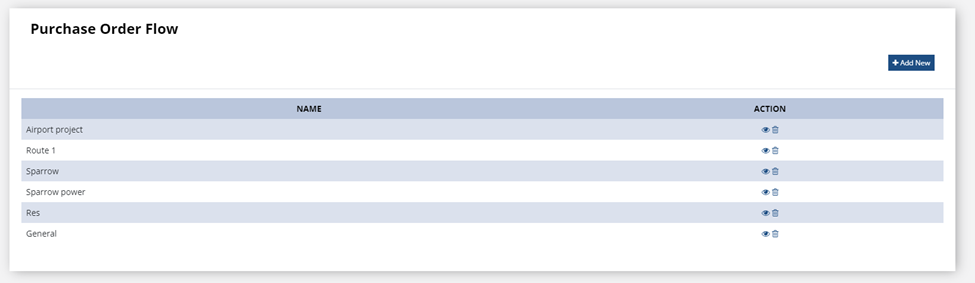
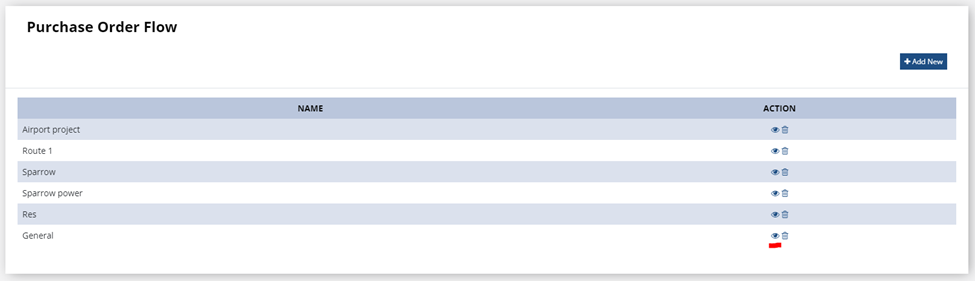
Creating a PO approval route-specific for each project
Click 'Add New' and add a project name
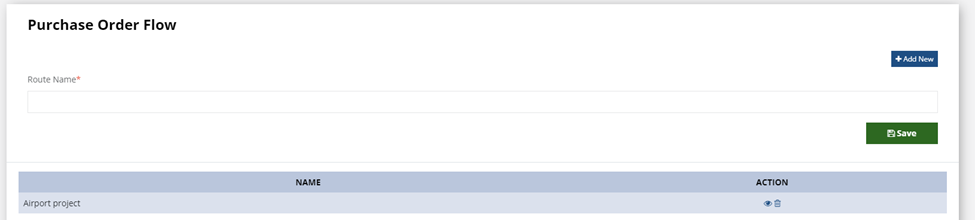
Add the route name and 'save'
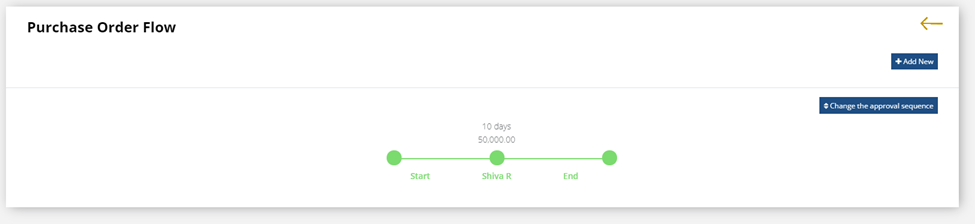
Add users and change the sequence users in the route for approval
Click the view button for the approval route.
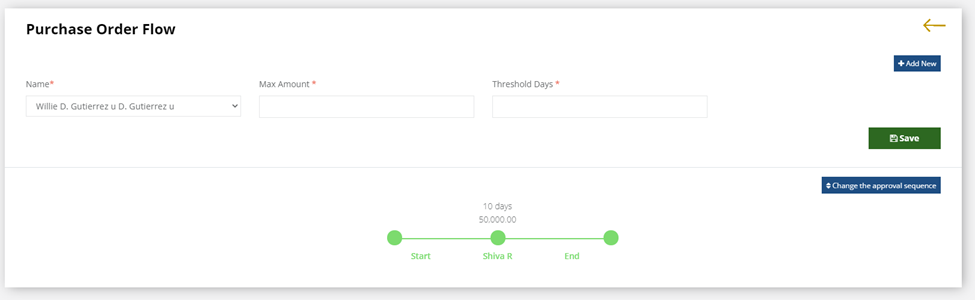
Click 'Add New'
You will see the drop-down list of users.
Select the name of the user to add to the route.
Add the value of the purchase order limit, the number of days to approve
Click Save
You will have now the route defined.
You can create as many project-based or general routes as you need.
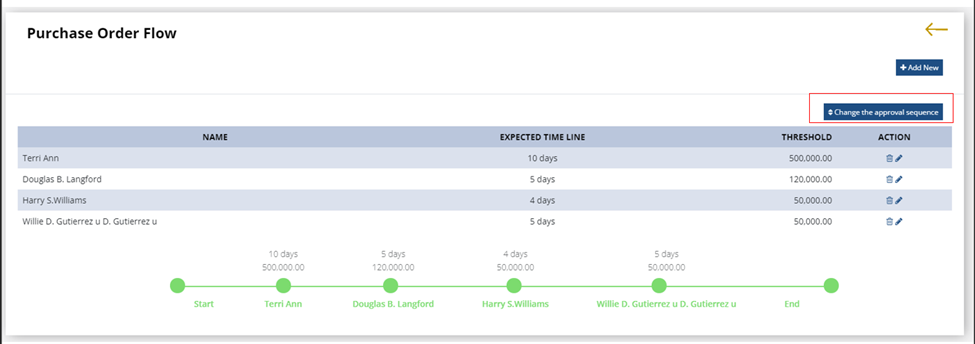
Change the sequence of the team members
Click 'Change the Approval sequence'
You can drag and drop the names using the mouse button.
The sequence diagram will update based on the selected sequence
________________________________________
Create Purchase Order
Click Purchase order on the left main menu
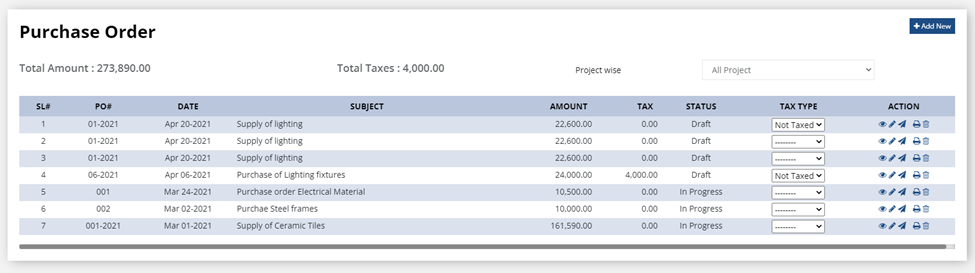
Click 'Add New'
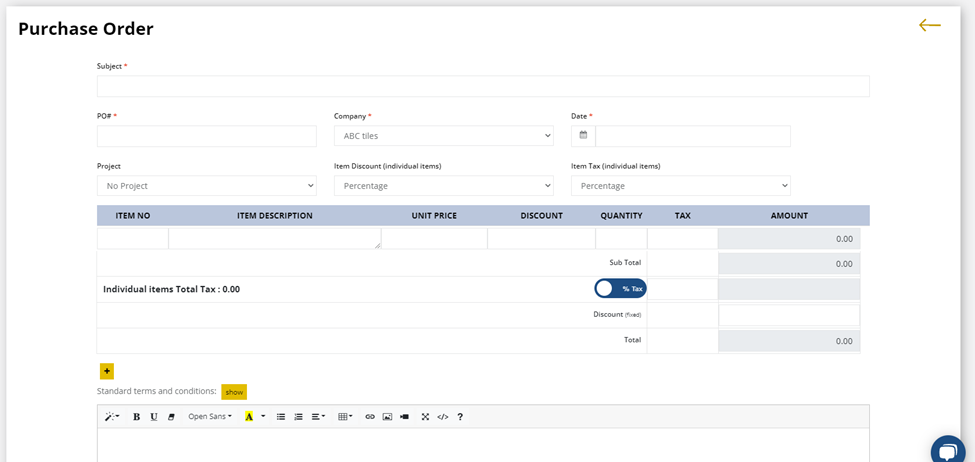
- Select the company, add PO number and other relevant information
- Add items that are needed to be ordered (RealTraker also suggests the items that are already in your inventory system)
- You can add the tax and discount for each item or on the subtotal.
- Select and customize the terms and conditions
- If you have any files, attach

Select the Route for the Purchase order and Save it.
If there its only one user creating and approving the purchase orders, select 'No Route'
- Save it
- Print it
- Issue the Purchase Order to the recipients
________________________________________
Forward the Purchase Order for approval
- Click the 'Forward the Purchase Order ' to send it to the next user in the approval route.
- That user will receive a notification requesting approval of the PO
- Users supposed to act on the PO can approve or comment on the inputs in the bottom panel.
- The PO will automatically be forwarded to the next user in the sequence.
- When the sequence is complete, the status of the PO in the list will change to 'Complete'
- Print it
- Issue the Purchase Order to the recipients
Filter purchase order by Project
You can filter purchase orders using the name of the project in the search field
Select the project name from the Dropdown list of projects
The summary list will show only the PO's issued for that project.
The total amount of the Purchase Order will also show the value of the selected PO's
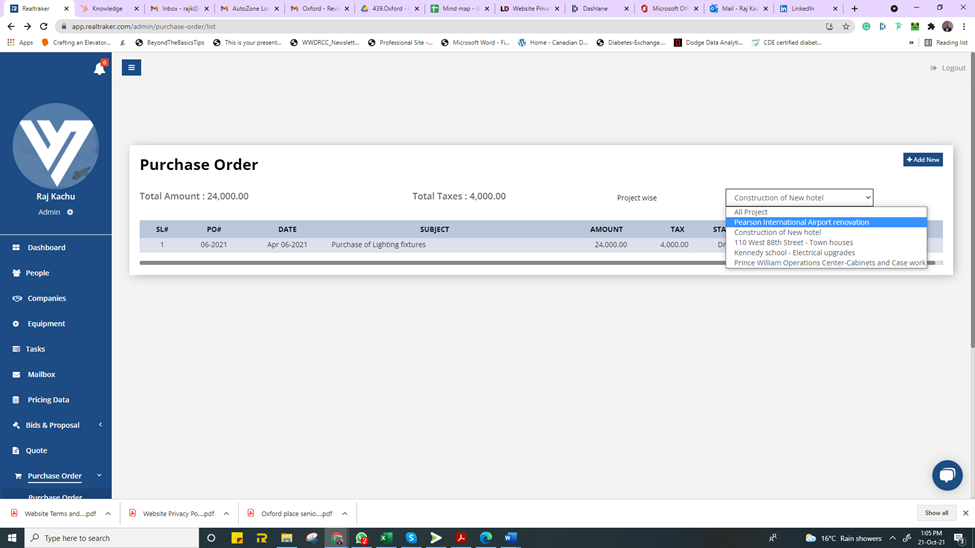
Filtered list of Purchase Orders

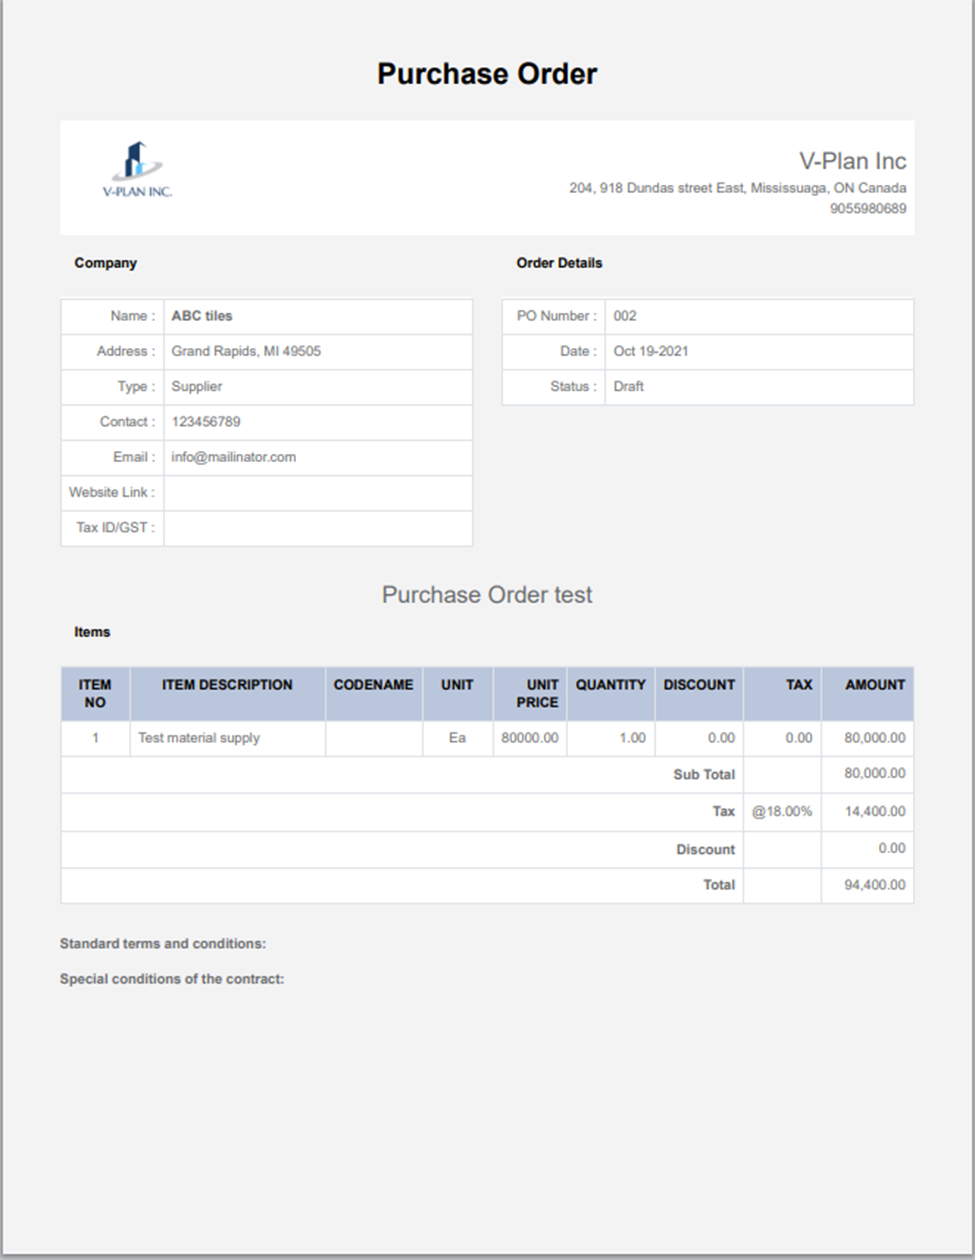
A printout of the completed Purchase Order
________________________________________
________________________________________
FAQ
Q. I do not see the company logo and the details in the PO
A. The company information and logo are directly called from the details in the 'Company' tab in the left main menu. Once you set it up, the information is used in all applicable sections